Signing into Brex
Overview
Depending on what works best for your team, you have several options that they can use to access their Brex account from either the dashboard or mobile app.
Brex email and password
When signing into either your Brex dashboard on the web or the Brex app on mobile, you have the option to manually enter the email address and password associated with your Brex account. All Brex users are required to use multi-factor authentication to provide an added layer of security to their account, and this method would require two-factor authentication (2FA) and/or device verification. We strongly recommend against sharing passwords or MFA devices between Brex accounts. If you need to allow multiple users to share a single Brex account, you can use delegated access features such as Pro Access and copilot
Enterprise IdP login
The Enterprise IdP login gives your employees the option to sign into their Brex account using Google or Microsoft logins.
- This will make it easier for your employees to access the Brex dashboard and reduce the number of passwords they need to remember.
- You can leverage the advantages of single sign-on (SSO) without having your own dedicated IdP.
Note: The email associated with the Google or Microsoft account must match the email associated with the Brex account. Any account admin or card admin on your account can enable this feature in their dashboard: Click your name in the top right corner and go to Company settings > Company. Toggle on Enable logins with Google and Microsoft.
Once turned on, your employees will be able to Sign in with Google or Sign in with Microsoft on the Brex sign-in page. Prior to an account admin or card admin enabling these features, clicking either button will result in an error message.
Single Sign-On (SSO)
PremiumEnterpriseSmart card
Brex allows your team to utilize an SSO with your Identity Provider (IdP) by leveraging OpenID Connect (OIDC) or Security Assertion Markup Language (SAML). Brex’s SSO integration provides a secure and seamless way to sign in with your own IdPs and also eliminates the need for employees to enter credentials to prove their identities repeatedly. After the initial setup effort, SSO gives you more control to easily turn off employee access and better speed and efficiency with Brex. Users who are configured to sign in with SSO will not be prompted for MFA by Brex. Disabling SSO for these users will re-enable the MFA requirement automatically. Enterprise IDP sign-in and SSO cannot be configured at the same time.
1. Setting up SSO
Step 1: As an account admin or card admin, navigate to the Security tab of your dashboard. Step 2: Click on Authentication > Setup Single Sign-On. Step 3: Select your integration provider. Your Identity Provider (IdP) (such as Okta, OneLogin, Google Workspace, etc) must support SSO via OIDC or SAML protocols. Step 4: Choose your integration type (OIDC or SAML). For OIDC configurations you’ll need:
- The Client ID and Client Secret from your OIDC application.
- The issuer URL value from your OIDC application. This must be where the /.well-known/openid-configuration endpoint is hosted.
For SAML configurations you’ll need:
- Your SAML Identity Provider Single Sign-On URL.
- Your SAML Identity Provider Issuer URL.
- The X.509 Signing Certificate for your application.
Click Save configuration to complete setup. To configure your routing mode and add users to the connection, please follow the steps below.
2. Configuring your routing mode
Step 1: Once you’ve set up SSO, navigate to the Security tab of your dashboard. Step 2: Click on Authentication. A details pane will open up. Step 3: Select your routing mode. Here, you can decide whether you want either:
- Individual users to sign in via your provider.
- If you’ve selected this option, you can add or remove users here.
- You can use this option to route individual users to SSO.
- All users to sign in via your provider.
- If you’ve selected this option, you can add users as exceptions and route them through password entry instead.
- You can select this option to enable SSO for all users.
To change the routing mode, you’ll first need to ensure the integration is disabled. You can click the disable toggle. Note: If you click disconnect on your integration, you’ll need to set it up again from scratch.
3. Enabling SSO
To enable the SSO integration, use the toggle in the Authentication details pane. Users will not be routed to SSO regardless of your routing mode while Integration status is Disabled.
4. Enabling SSO for specific users and SSO exceptions
You can choose to specifically include users in your new SSO integration. This is helpful for testing whether sign-in works as expected on a subset of your Brex users while in the Individual users are sent to your provider’s Sign In routing mode
This same flow can be used from All users are sent to your provider’s Sign In routing mode to exclude users from SSO. These users will use password authentication with MFA.
Note: You must toggle the Integration status to Enabled when you’re ready to route users to your configured SSO integration.
- Navigate to the Security tab
- Click Authentication and add users to the list at the bottom of the SSO settings menu.
Security Assertion Markup Language 2.0 (SAML) SSO
Values provided by Brex for your SAML application
- Assertion Consumer Service URL (ACS URL): This is the custom URL generated by Brex where users will be redirected and present their SAML assertion.
- This is sometimes referred to as the “Single sign-on URL” or “SSO URL”.
- This value can also be used for the “Recipient” and “Destination” URL in a SAML application.
- Audience: This identifies the SAML Service Provider managed by Brex and will be included in SAML assertions.
- This is sometimes referred to as the “Entity ID” or “SP Entity ID”.
Values to configure in Brex from your SAML application
- Identity provider URL: The URL that Brex will redirect SSO users to when authenticating with SSO.
- Also known as “Identity Provider Single sign-on URL”.
- Destination URL: Used during the SAML process exchange to identify the intended recipient.
- By default, we’ll make this identical to the Identity provider URL.
- Identity provider issuer: The URL that we’ll expect to see SAML assertions issued from.
- SAML signing certificate: Provide the X.509 certificate used by your application to sign SAML messages, this is typically in .pem, .cer, or .cert format.
Required SAML attributes
We require that SAML assertions contain an Attribute Statement with the name email containing the email address of the Brex user’s account. This is configured in your SAML Identity Provider. Here is an example of a valid email attribute statement:
Please ensure that you have the mappings configured according to the example image below:
Please note that if you are using the Brex app from Okta’s App Catalog, the email attribute will automatically be mapped to user.email. If a different field in Okta maps to the email address of your Brex users’ accounts, you will need to create a custom app instead.
Other required configurations
- You must use SHA-256 as the signing algorithm for SAML assertions and responses in your SAML application.
- Ensure that your IDPs clock is accurate.
OpenID Connect (OIDC) SSO
Initial setup
Step 1: Sign in as an account admin or card admin to your IdP console. Step 2: Follow your IdP guidelines to create a Web OIDC application or client. Step 3: Enter this redirect URL: https://accounts-api.brex.com/oauth2/v1/authorize/callback. The client must support the authorization_code grant type and expose a well-formatted OIDC discovery document at the standard path {{issuer}}/.well-known/openid-configuration. Step 4: Configure the integration in Brex with your application details.
Okta OIDC Integration
Step 1: Sign in to your Okta admin console. Step 2: Create an Application Integration under Applications > Applications. Under Sign-in Method, choose OIDC - OpenID Connect. Under Application Type, choose Web Application. Click Next. Step 3: Name the application integration “Brex” or “Brex Web App” so users can identify it from the app launcher. You can also add the Brex logo. Step 4: Use https://accounts-api.brex.com/oauth2/v1/authorize/callback as the sign-in redirect URL and your Brex dashboard link (http://dashboard.brex.com/) as the sign-out redirect URL. Add implicit for grant type and leave other optional fields as they are. Step 5: For controlled access, choose either Allow everyone in your organization to access or Limit access to selected groups for a gradual rollout. Click Save. Step 6: Edit the app from General settings and change Login initiated by to either Okta or App. Step 7: Check Display application icon to users and Display application icon in the Okta Mobile app. Input your Dashboard link (https://dashboard.brex.com) as the initial sign-in URL. Optional: After the application is created, you can also configure a specific sign-in policy for this application under the Sign-on tab.
Add Brex from Okta Integration Network (OIN)
Step 1: Sign in to your Okta admin console. Step 2: Go to Applications > Applications, and browse the app catalog. Search “Brex” and add integration. Step 3: Finish up the General Settings according to your needs and click Next. Step 4: Choose OpenID Connect as your sign on methods and select Email as the Application username format. Click Done. Step 5: Click Sign On tab and copy the Client ID, Client secret, and OpenID Provider Metadata’s URL into a text file. We’ll send you an email link to collect it. Step 6: We’ll complete the SSO registration and enable both IdP-initiated flow and SP-initiated flow for you. Visit https://dashboard.brex.com/?iss=[oktaIssuer] to enter the SP-initiated flow. Please replace [oktaIssuer] with the issuer URL you can find in your OpenID provider metadata.
Microsoft Entra ID with OIDC
We currently do not support OIDC with Microsoft Entra ID. Please use SAML for SSO with Microsoft Entra ID.
Troubleshooting your SSO connection
If your integration is not working as expected, please follow these steps:
- Confirm that the configuration on both sides of the connection have been set up correctly, as per the relevant SSO guides, or navigate to Security > Audit trail and check for SSO authentication errors
- Check the status to ensure it is enabled. If disabled, please click the enable and disable toggle to enable it again.
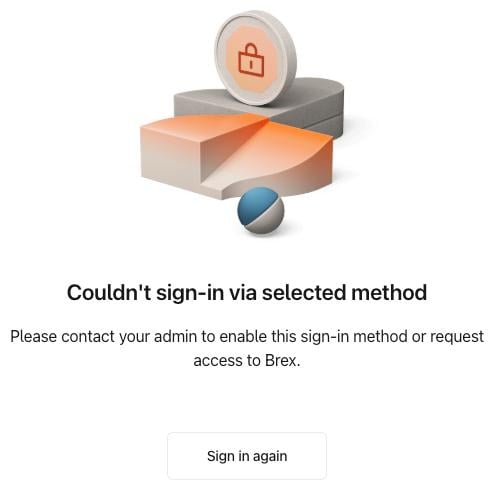
If you cannot sign in even though your SSO integration is enabled, please reach out to Brex support.
Attribute mapping errors (SAML)
This is often coupled with the error “SAML assertion email attribute cannot be mapped to Brex user.” To resolve this issue check that your SAML assertion contains an email attribute.
If using Microsoft Entra, please ensure your attributes and claims match the example shown below:
OIDC setup error
You may see the below error in the SSO wizard. This is most often because Brex cannot resolve your IDPs OIDC metadata from the constructed URL {{issuer}}/.well-known/openid-configuration. Please confirm that a well-formed JSON document adhering to the OIDC discovery specification exists at this path. You can find the specification requirements here: https://openid.net/specs/openid-connect-discovery-1_0.html#ProviderMetadata